Accessing the Integration Settings
To get started:- Go to your Integrations menu in Yess,
- Select Salesforce from the list of supported integrations
- You’ll see a dedicated configuration screen for Salesforce.
Only users with the Admin (Tenant) role can view and manage this setup.
Step 1: Authenticate with Salesforce
-
Click Connect and follow the login flow follow the prompts to confirm and authorize the Yess app integration.
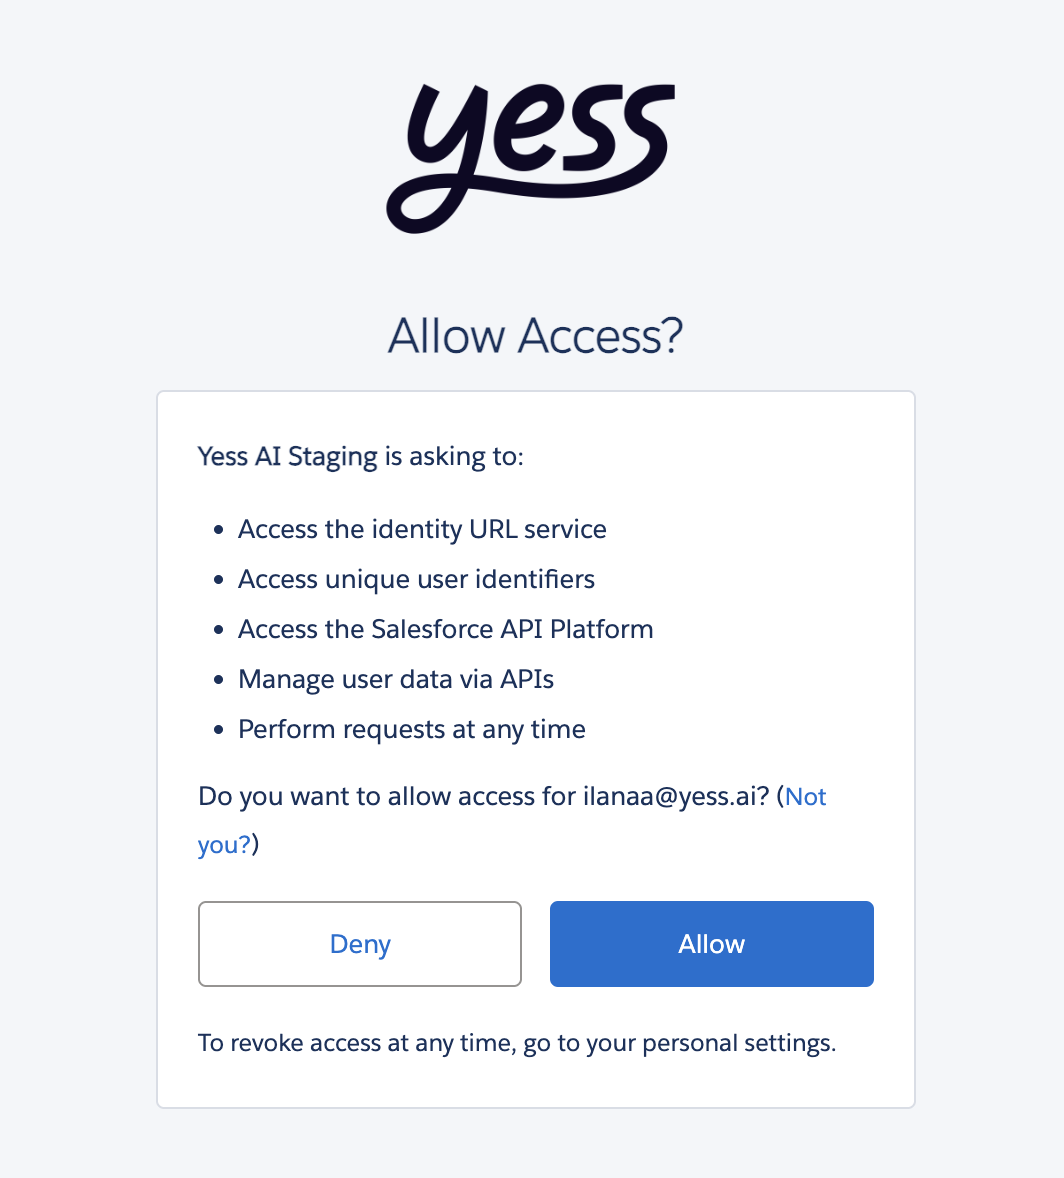
- Once authenticated, you’ll see your connection status and email displayed.
Step 2: Define What Data to Sync
You can choose which records to sync from Salesforce using flexible conditions.- Use familiar Salesforce-like filters such as:
SELECT FIELDS(STANDARD) FROM ACCOUNT WHERE industry = 'Technology'
- Combine filters using AND/OR conditions.
- Supported Salesforce objects:
- Leads
- Contacts (will also pull related Accounts)
- Accounts (will also pull related Contacts)
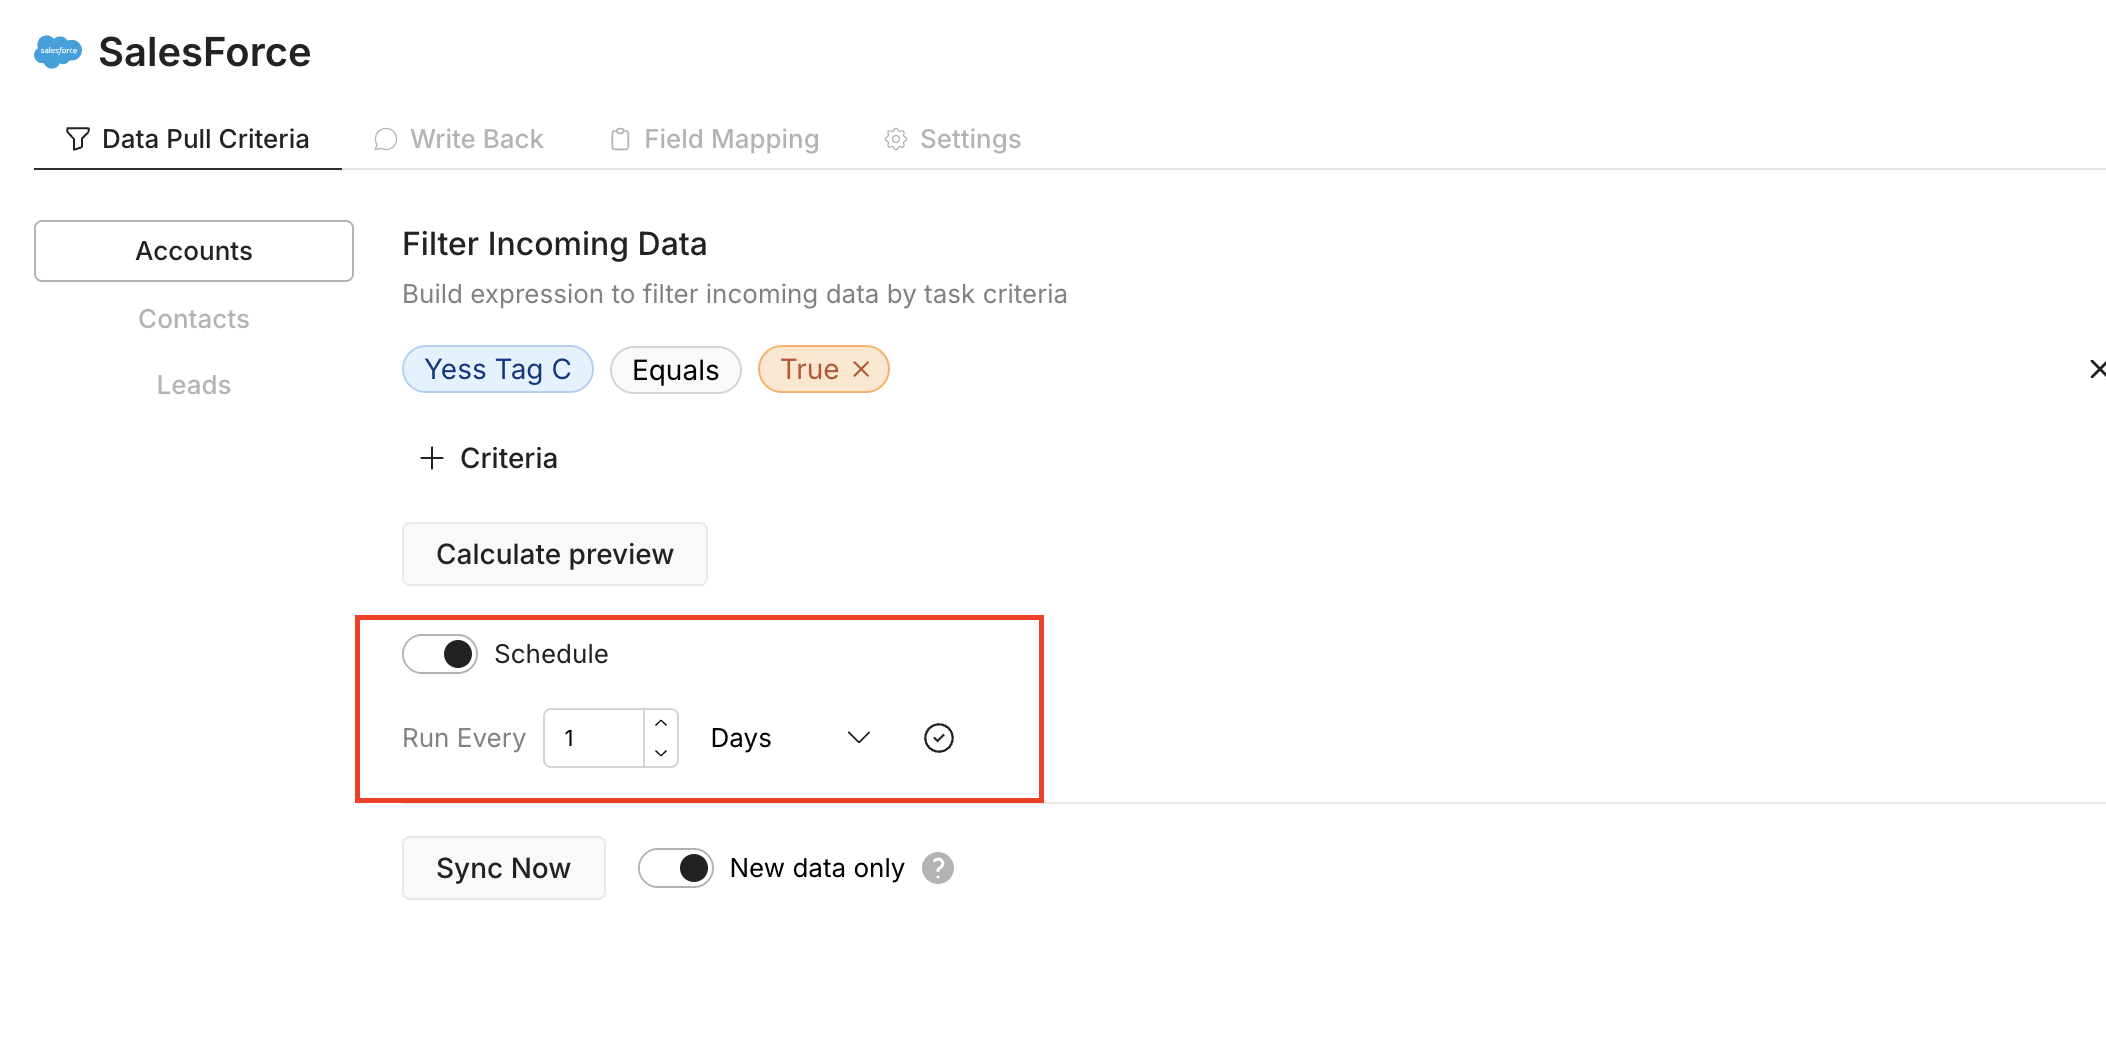
- Set Schedule
- Configure when your data syncs automatically between Salesforce and Yess
-
Toggle “Schedule”: This switch enables or disables the automatic scheduling.
- If it’s turned on, the integration will run on a recurring basis.
- If it’s off, the process won’t run on a schedule (you may trigger it manually instead).
-
Choose how often the integration runs by setting a number and a time unit—for example, “Run every 1 day” means the integration will run once a day.
Save your selected schedule by clicking the Checkmark icon
-
Toggle “Schedule”: This switch enables or disables the automatic scheduling.
- Manual Sync options
- If you need to sync outside of the regular schedule, you can trigger it manually:
- Sync Now: Click Sync Now to immediately sync your data based on the current sync criteria.
- New Data Only: Enable the New Data Only toggle to pull only records that were created or updated since the last sync.(If disabled, the system will perform a full sync based on the selected filters.)
Step 3: Configure Write-Back Settings
Yess writes activities back into Salesforce as part of the integration setup. This ensures your team’s LinkedIn and email engagement history is captured and visible within your CRM.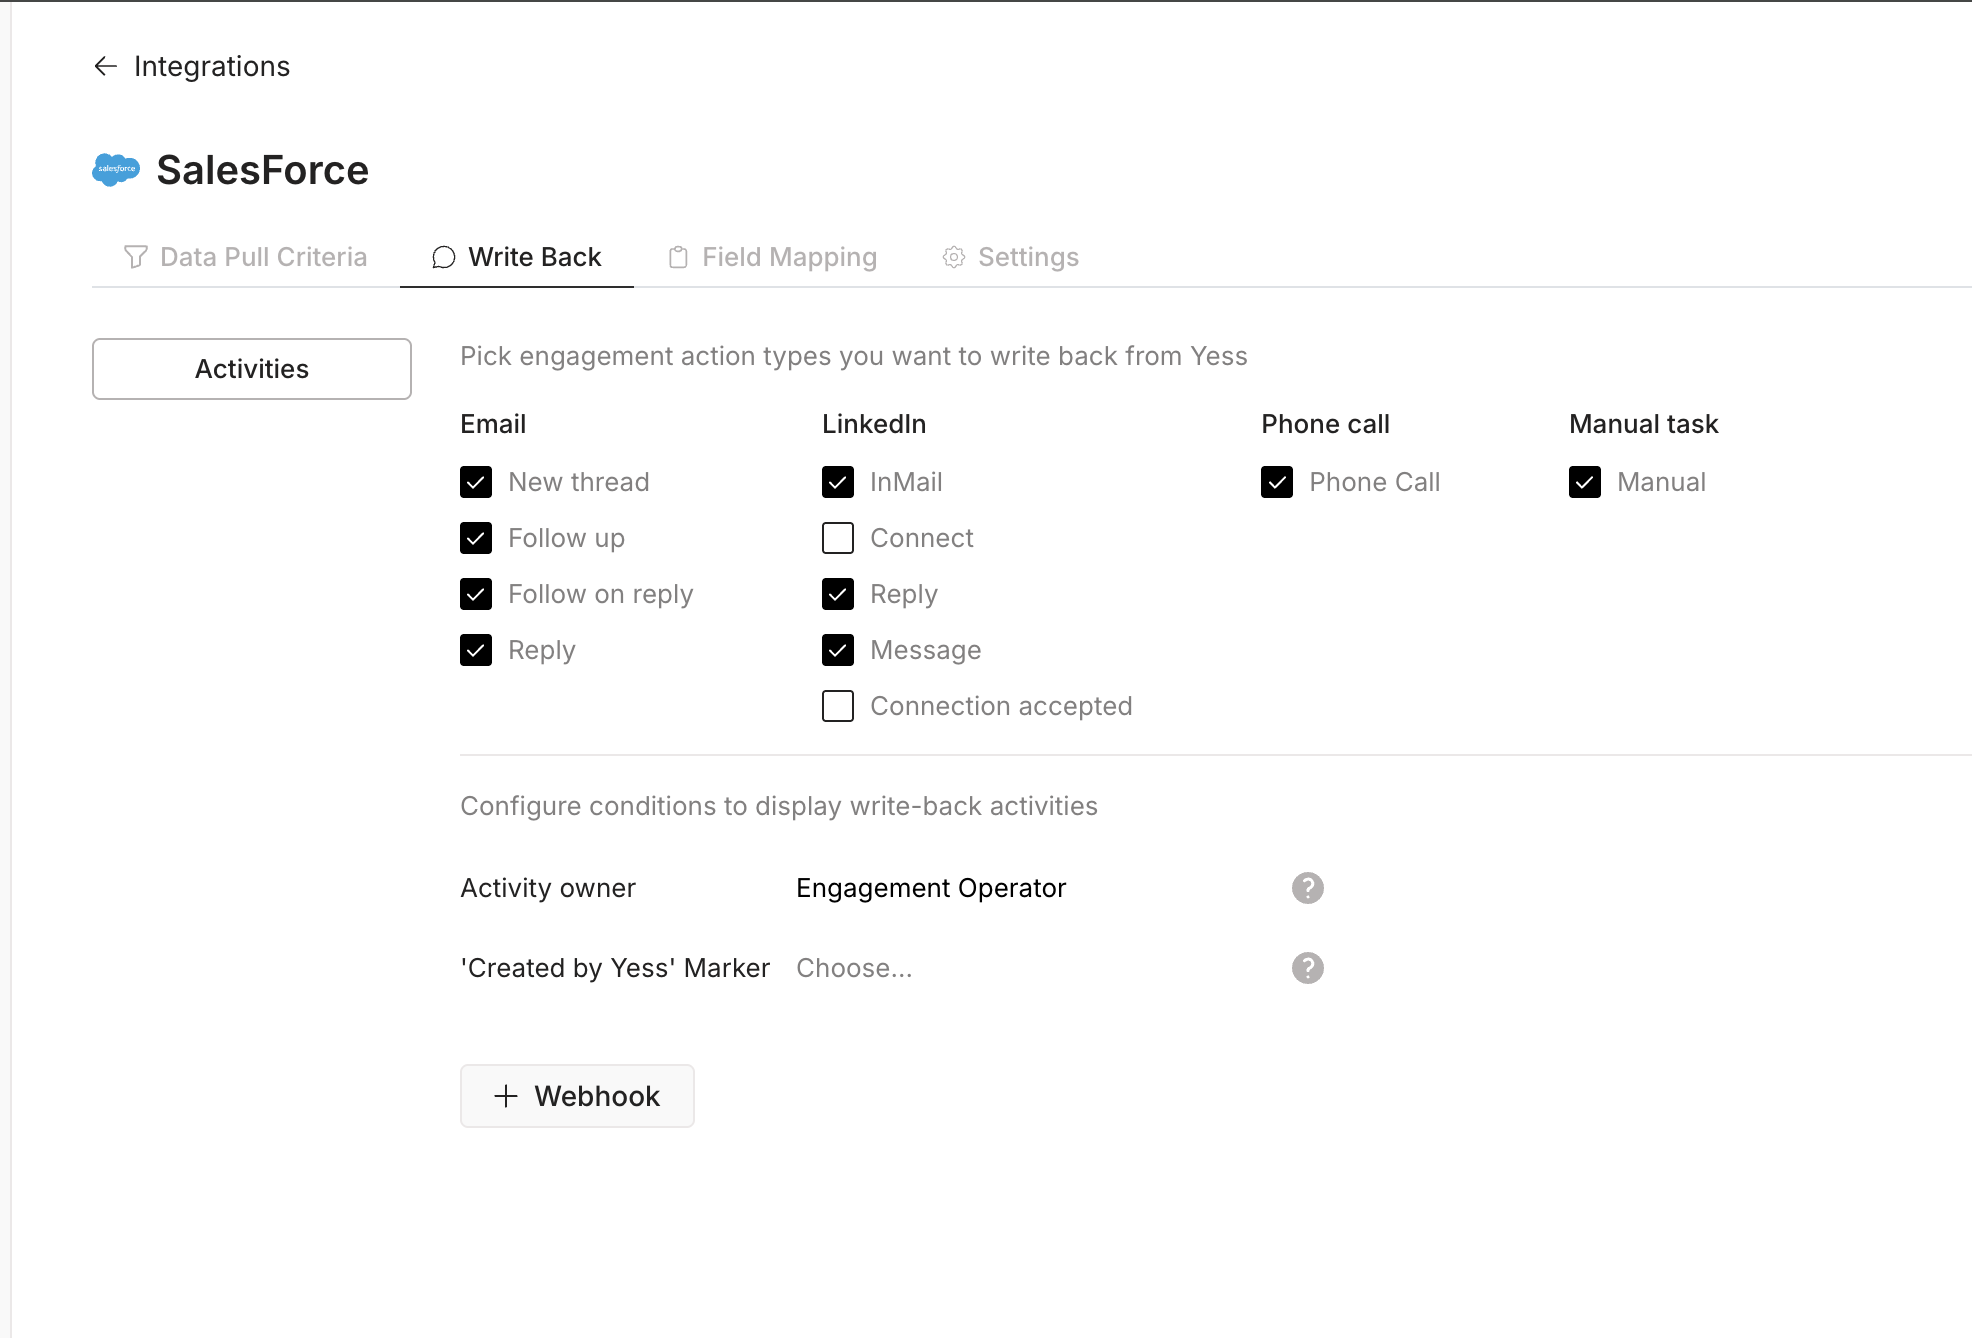
- New thread – Logs the initial email sent to a lead.
- Follow up – Records follow-up emails as part of ongoing engagement.
- Follow on reply – Tracks follow-up actions triggered by receiving a reply.
- Reply – Logs direct responses sent from the lead.
- Message – Logs LinkedIn one-on-one messages sent via Yess.
- InMail – Records LinkedIn InMail engagements.
- Reply – Tracks replies sent to LinkedIn messages or InMails.
- Connection request – Logs when a LinkedIn connection request is sent to a lead.
- Connection request accepted – Tracks when a LinkedIn connection request is accepted by a lead.
- Phone Call – Logs outbound call activities performed through Yess.
- Manual – Records manual actions logged by the user through Yess .
- Operator – The person who executed the engagement.
- Sponsor – The person on whose behalf the message was sent.
- Admin
Admin is used as a fallback only if the selected owner (Operator or Sponsor) is not available for a specific engagement.
To use this feature, you’ll need to create a custom checkbox field on the Salesforce Activity object.
- Once the field is created, select it within the Yess integration settings as the “Created by Yess” marker.
- Yess will automatically set this field to
truefor any engagement written back via the platform.
- Enable webhooks for near real-time syncing of write-back data.
- Customize how each type of engagement is mapped to fields or objects in Salesforce.
Step 4: Field Mapping
Map the fields from Salesforce to Yess for:- Leads
- Contacts
- Accounts
If you’re importing data from Outreach and certain fields don’t have a matching default field in Yess, you now have two options for retaining that information:
- Map to a Custom Field (Recommended)
- Use Tags as a Backup
- Use “Tag” field to add the field’s value only to the Tags column.
-
Use “Tag with Prefix” to include both the field name and value in the format:
Field Name: Value ( Industry: Finance).

Step 5: Settings
Configure API Limit (Optional) By default, Yess limits Salesforce API usage to prevent reaching platform limits.- Default limit: 1,000 API requests per day.
- You can update the limit and set a reset interval:
- Daily
- Monthly
- Yearly
- You can also choose to disable the limit entirely (recommended for most users).
Viewing Yess Activities in Salesforce
All activities performed in Yess are automatically logged as tasks in Salesforce. To view these: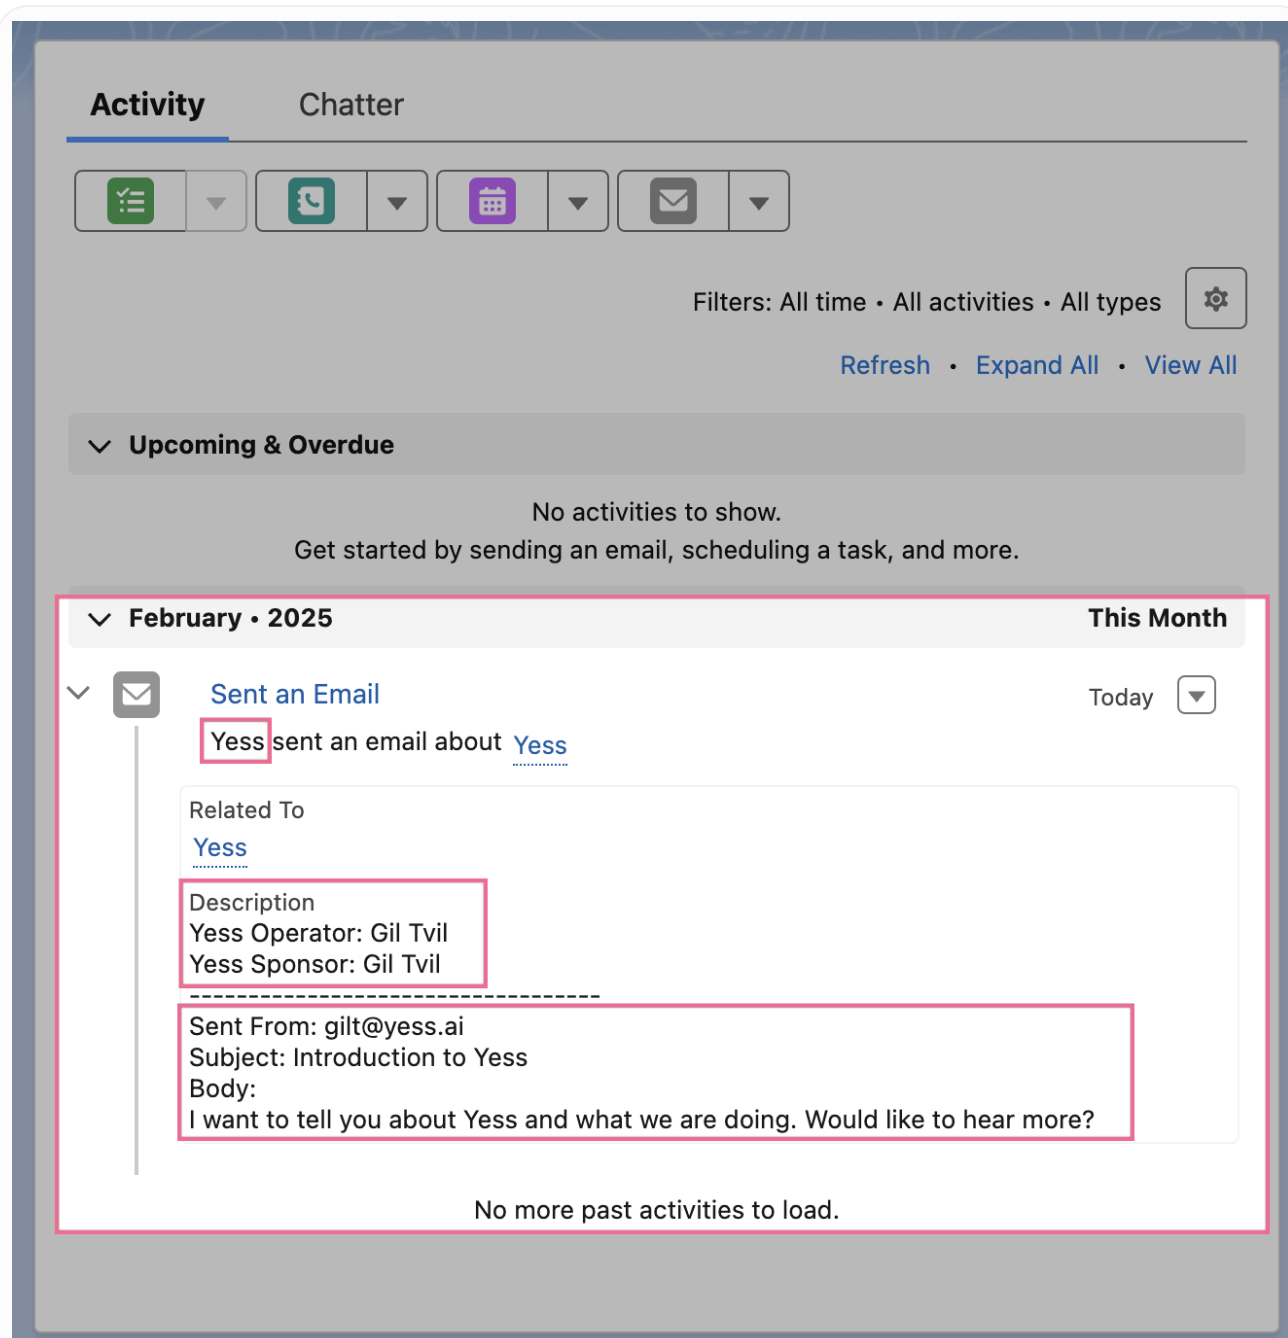
Accessing Salesforce Records in Yess
You can quickly access Salesforce records directly from Yess:Find Salesforce Icon
Look for the Salesforce icon in the Leads table, “Sources” coloumn