How It Works
- Tracking: Yess monitors your Salesloft cadences and identifies steps requiring LinkedIn actions (like connection requests and messages).
- Automation: When a lead reaches a LinkedIn step, Yess automatically executes the action for you.
- Sync: All relevant lead and account data is synced and mapped to Yess objects for unified tracking.
- Logging: Each LinkedIn activity performed by Yess is automatically logged in Salesloft.
Step 1: Authenticate with Salesloft
Go to the Integrations page in your Yess admin settings.- Click “Connect” next to Salesloft.
- Log in with your Salesloft credentials and authorize access.
- Once connected, Yess will begin syncing your cadences and leads.
Step 2: Enable LinkedIn Automation
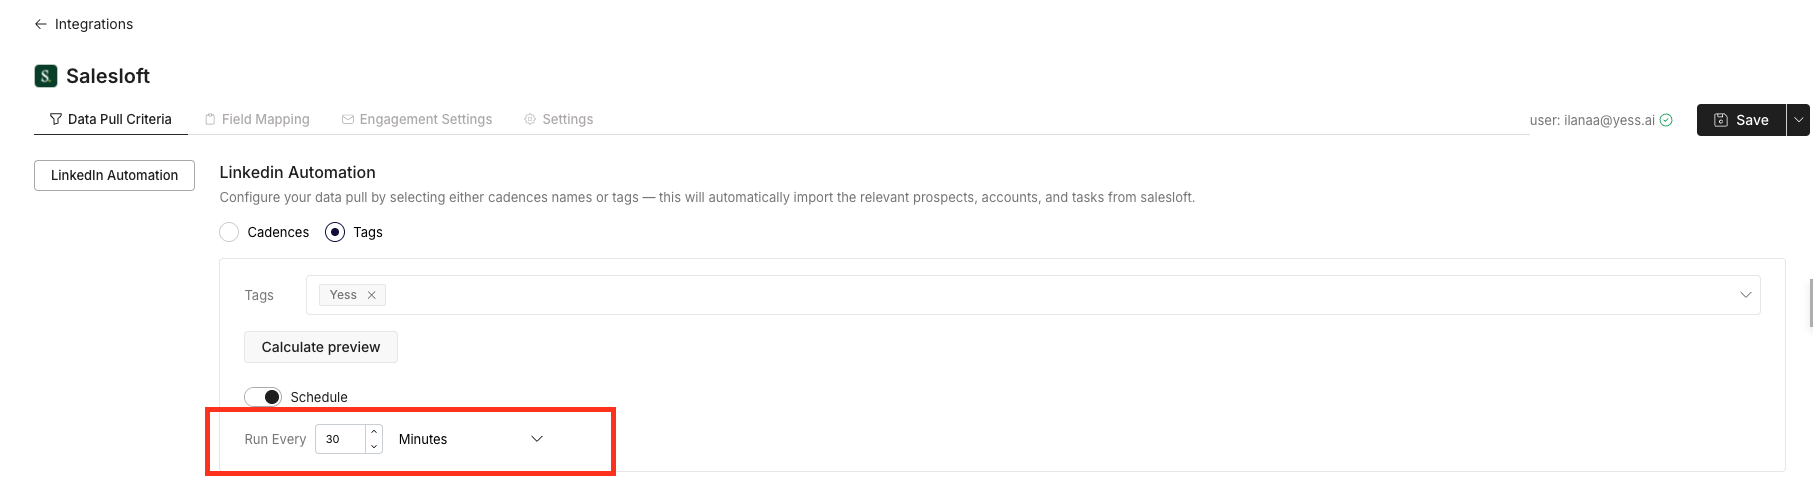
- In the Data Pull Criteria tab, select LinkedIn Automation.
- Specify which Salesloft cadences should have LinkedIn steps automated.
- Choose from a cadences list or by using tags
To use tags, first create the tag in Salesloft and assign it to your relevant cadences. You can update the tag at any time, and Yess will include all cadences with that tag in the automation.
- Set Schedule
- Configure when your data syncs automatically between Salesloft and Yess
-
Toggle “Schedule”: This switch enables or disables the automatic scheduling.
- If it’s turned on, the integration will run on a recurring basis.
- If it’s off, the process won’t run on a schedule (you may trigger it manually instead).
-
Choose how often the integration runs by setting a number and a time unit—for example, “Run every 1 day” means the integration will run once a day
-
Toggle “Schedule”: This switch enables or disables the automatic scheduling.
Step 3: Field Mapping
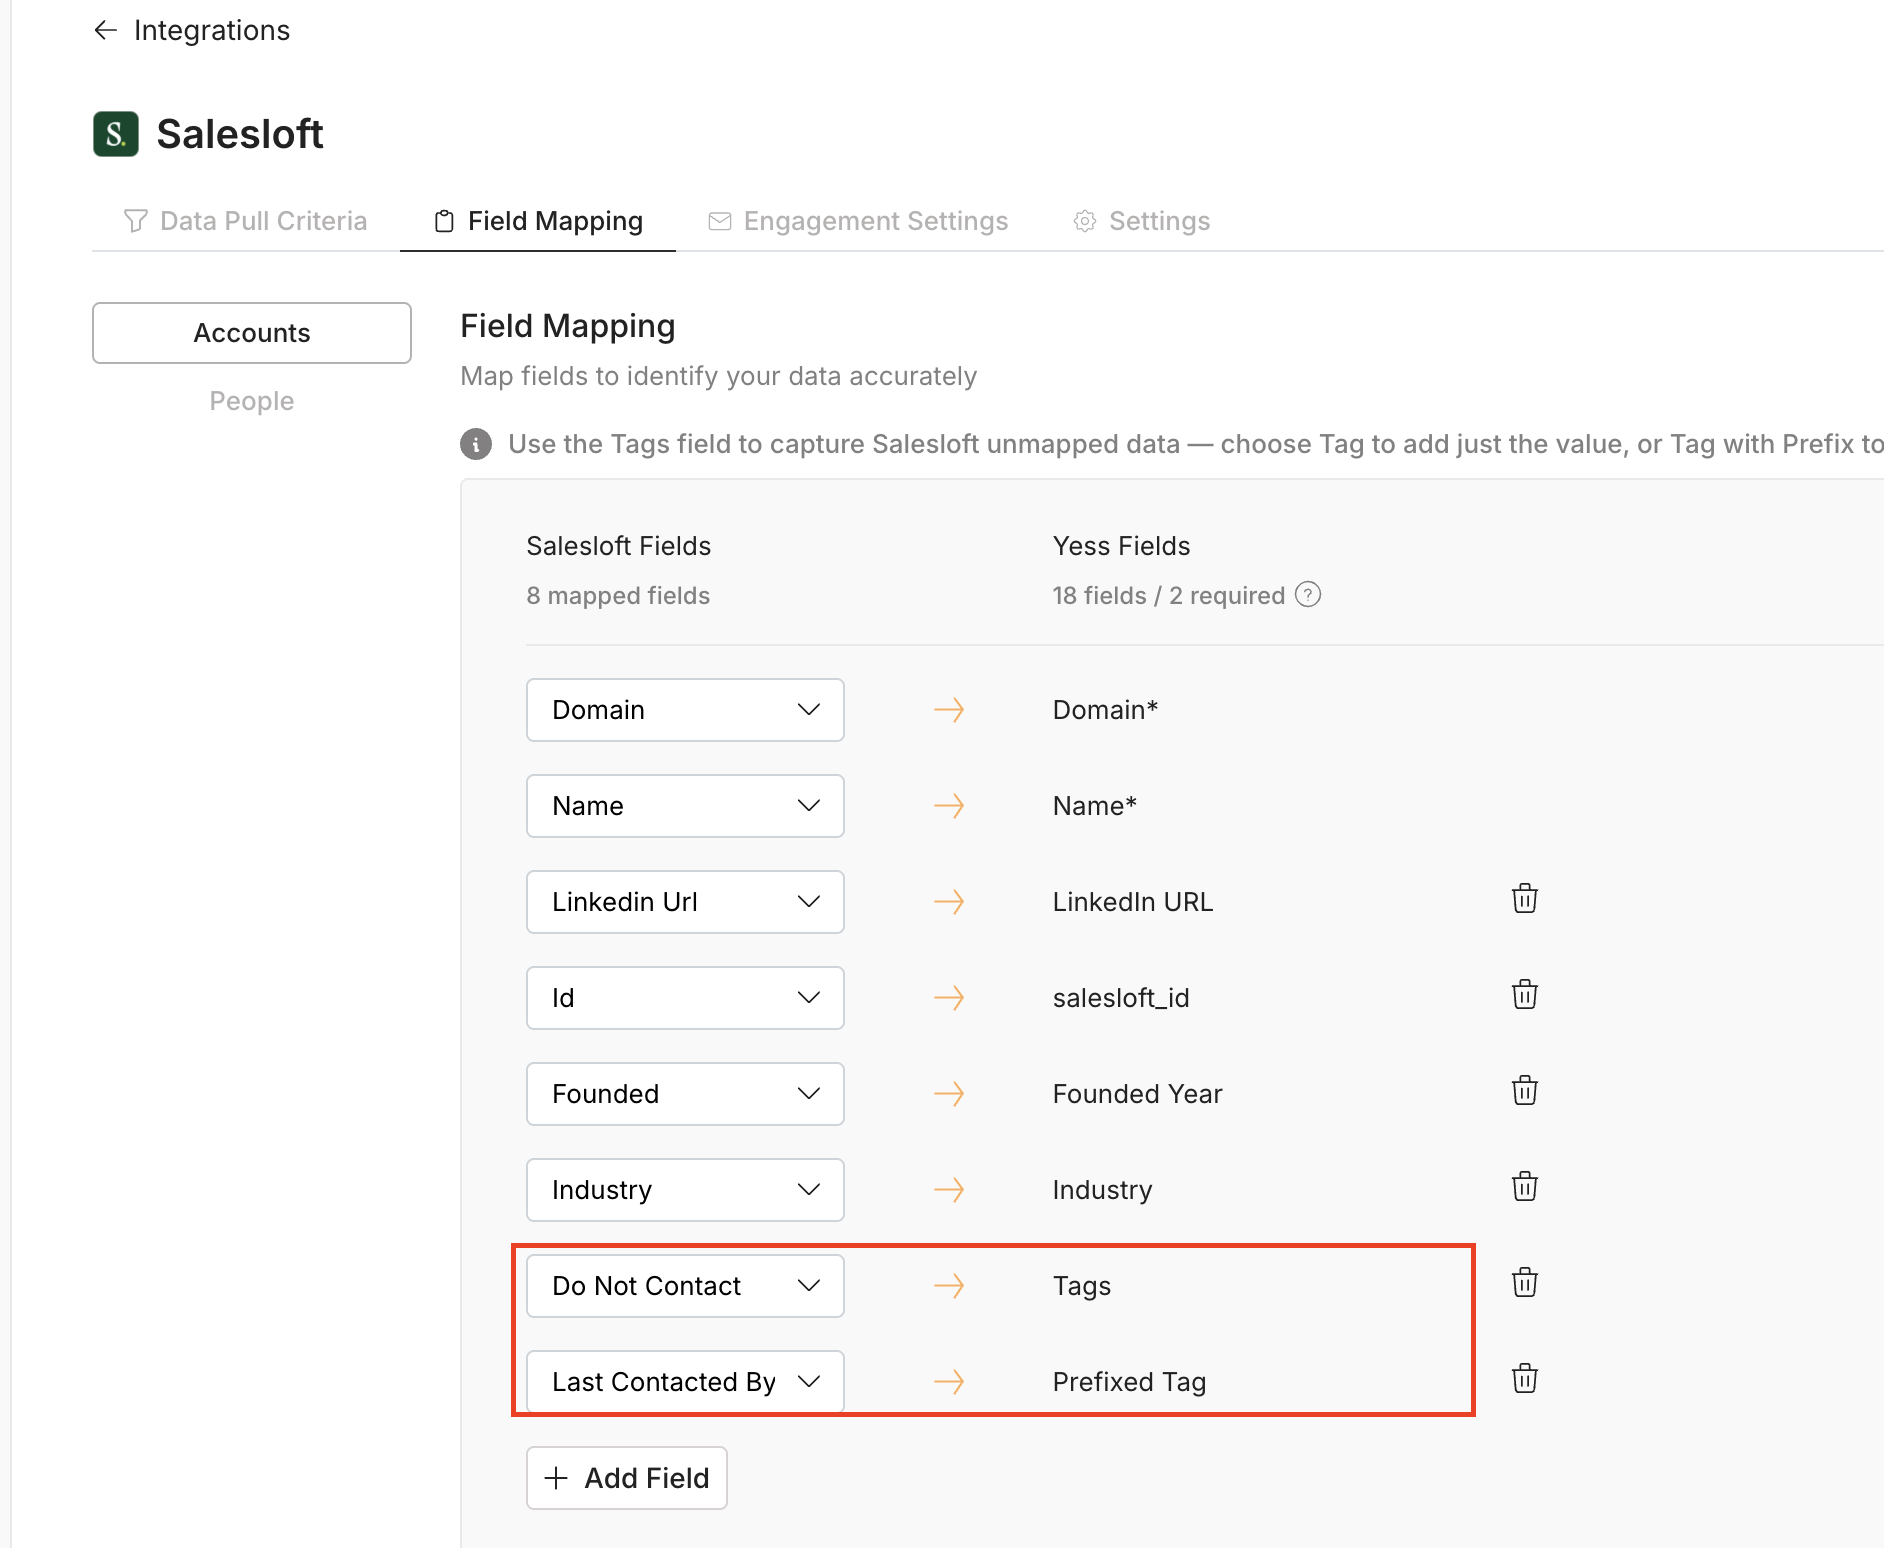
Once you’ve defined your data sync, move to the Field Mapping tab.- Map Account and People objects to the corresponding Yess objects.
- Ensure that all data points are correctly aligned for seamless integration and escalation flow.
If you have Salesloft fields that don’t have a dedicated destination field in Yess, you can still capture them using the Tags field.
- Use “Tag” field to add the field’s value only to the Tags column.
-
Use “Tag with Prefix” to include both the field name and value in the format:
Field Name: Value ( Industry: Finance).
Step 4: Engagement Settings
When using Salesloft’s LinkedIn automation through Yess, it’s important to ensure that every engagement step has valid content. To prevent automation from failing, Yess provides an AI-powered content fallback and instruction-aware generation mechanism that automatically fills in or adapts message content when needed. Why Is Content Fallback Needed? Salesloft doesn’t support predefined templates for LinkedIn steps. Reps often leave the message field empty or write short instructions instead of full messages (for example: “mention webinar,” “keep it short,” or “reference shared connection”). Because of this, Yess analyzes the Instructions field in every synced step and determines how to generate the final message to ensure the automation continues smoothly. How Yess Handles the Instructions Field| Type | Description | Yess Behavior |
|---|---|---|
| Instruction (General Guidance) | Notes or internal guidelines meant for the rep, not for the lead. Often short or directive (e.g., “mention the webinar,” “use a friendly tone”). | Yess uses these notes as context — shaping the tone, subject, or focus of the generated message — while still creating a full LinkedIn message ready to send. |
| Template-like Message | A nearly complete message that includes placeholders or merge fields (e.g., “Hi {first_name}, saw your post about {topic}”). | Yess uses this as the base text, polishes phrasing and tone, and automatically fills in missing variables (e.g., name, company) for a natural, final message. |
| Empty | The Instructions field is blank or includes only whitespace. | Yess automatically applies the relevant fallback content template (see section below) to generate a complete, ready-to-send message. |
For LinkedIn Connection Requests, if the Instructions field in Salesloft is empty, Yess sends the request without a message, following LinkedIn’s native behavior.Only when the Instructions field includes content (instructions, notes, or a draft message) does Yess apply the generation logic described above.
- Connection Request
- Linkedin Message
-
InMail
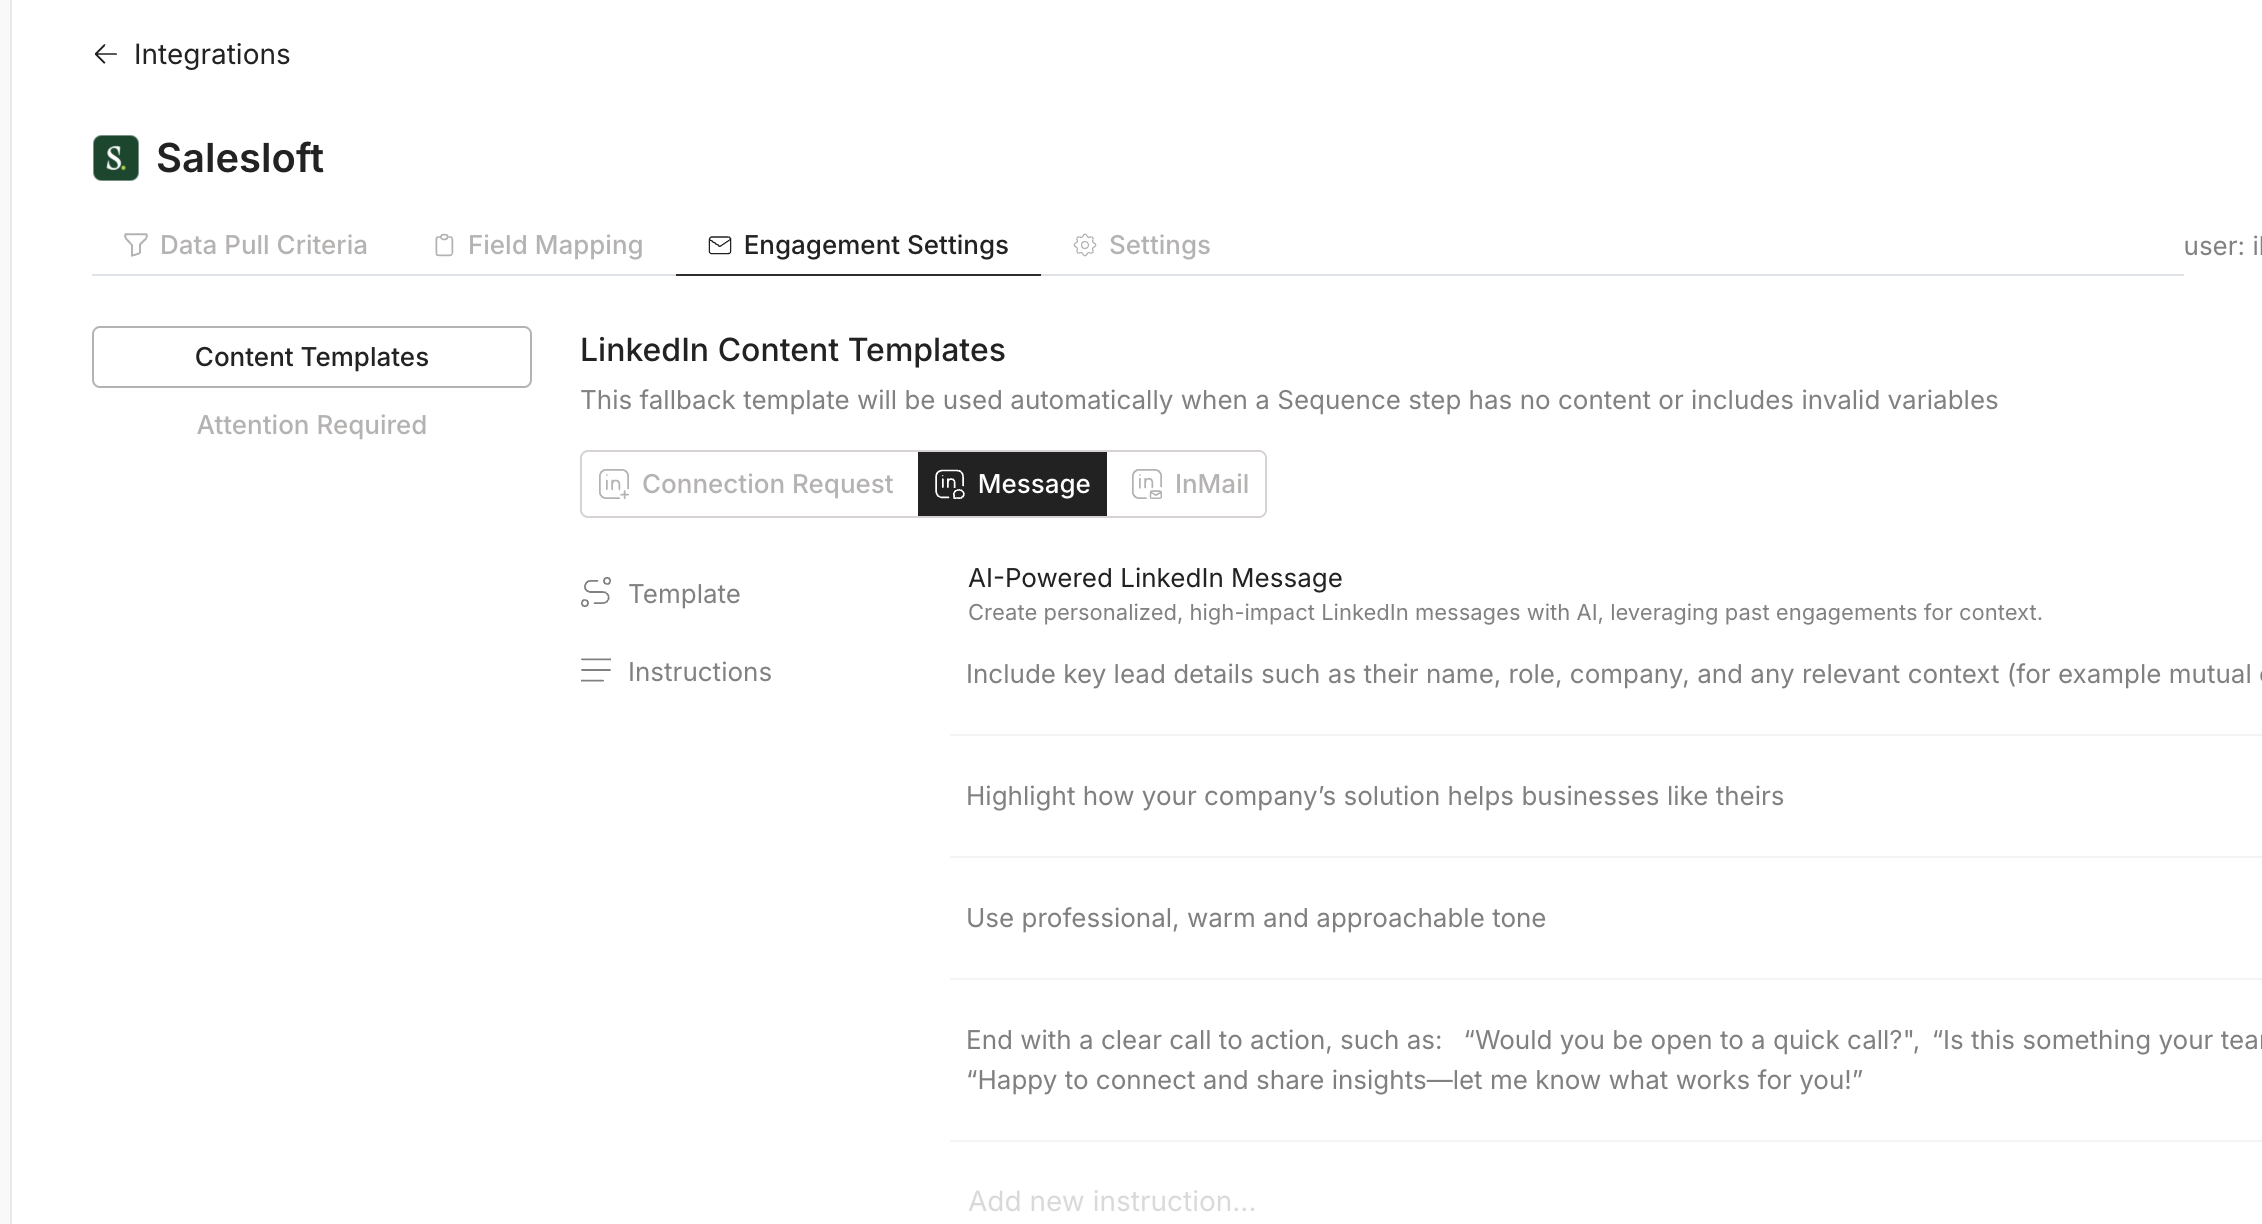
Fallback templates cannot currently be edited. If you’d like to make changes, please go to the Templates → Content page in Yess and create a new template that can be used based on engagement type.
Attention Required Settings
This setting controls how the system handles errors or issues during sequence steps that require user attention — such as missing data or invalid configurations. You can choose between two modes:- Skip – Set by default. The sequence will automatically skip any step that encounters an issue, and no notification will be shown.
- Block – The sequence will pause at the step with an issue and trigger an “Attention Required” notification so the user can take action. For a detailed explanation of how these notifications work, see the Salesloft Integration Error Handling documentation.
Step 5: Additional Settings (Optional)
Fine-tune your integration for your needs:- API Limit Settings:
- Set the maximum number of API calls per day, with adjustable intervals (daily, monthly, yearly).
- Default is 1,000 calls per day, but you can adjust or disable this as needed.
Saving Your Configuration
- Click Save in the upper right corner after completing all setup steps.